Tuesday, January 21, 2014

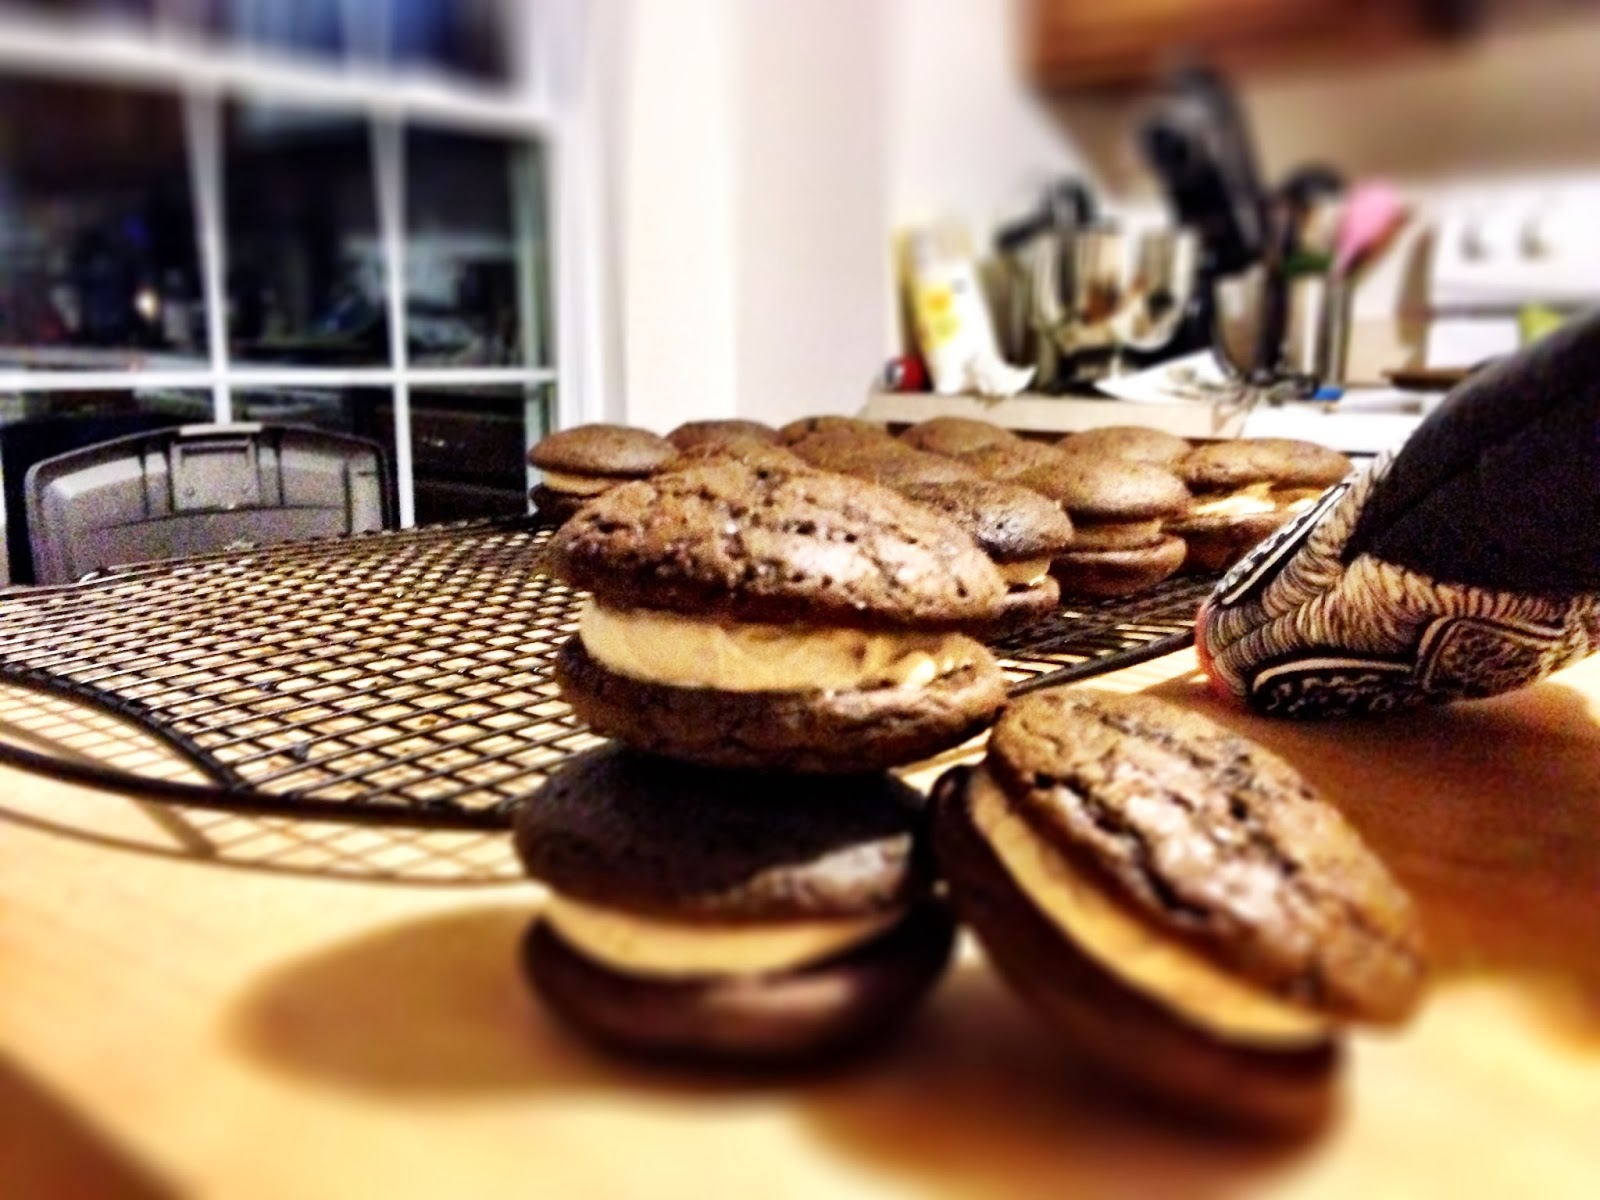
Coffee lovers only - Mocha and Caramel Macchiato Whoopie Pies!


Hello everyone! I know it's been way too long since my last post, and I know I say something to that affect at the beginning of every post...So, in conclusion, I'm a stinker, and I'm sorry! It's been about a week since Nationals, and I hope all of you spectators had just as much fun watching as I did performing! Seeing all of the signs out in the crowd was truly heartwarming, and unlike anything I've experienced before. So, thank you all! Since Nationals I've unfortunately been sick, so there isn't all that much new in my life to report on. All I've been doing is some coaching, a little tv watching, and a whole lot of daydreaming about something that is happening 11 days from now...A TRIP TO DISNEY! Thanks to Bella, and Colin who bought me tickets as a (very) early birthday gift! I am SO lucky to have them in my life, and I will never be able to thank them enough! I am obviously listening to disney pandora as I compose this, and singing along. Well, trying to at least, my sickness has taken my voice...I finally understand how Ariel feels. I will be healthy soon enough, and embarrassing myself (and everyone around me) in the wonderful world of Disney! By the way, if you haven't seen frozen yet, I suggest you cancel all your plans and get to the movie theatre the second you finish reading this. I'm obsessed, and if you don't love it we can't be friends. I'm sorry, but that's just the way it has to be. Anyway, when I'm sick something that makes me feel better is baking, and I promise the goodies aren't contaminated with disease :P. Since it has been so long since my last post, I'll be posting two recipes this time around. Mocha whoopie pies and Caramel Macchiato whoopie pies!

Mocha Whoopie Pies!

For the mocha cakes - 

• 3 tablespoons instant coffee
• 2 tablespoons hot water
• 2 1/4 cups flour
• 1/2 cup cocoa powder
• 1 1/2 teaspoons baking soda
• 1/2 teaspoon salt
• 4 tablespoons unsalted butter at room temp
• 4 tablespoons vegetable shortening
• 1 cup packed brown sugar (dark or light)
• 1 egg
• 1 teaspoon vanilla
• 1 cup milk

Preheat your oven to 375° and cover two baking sheets with parchment paper. Mix together the instant coffee and hot water and stir until dissolved. Mix the coffee into the milk and set aside. Combine the flour, cocoa, baking soda, and salt in a medium size bowl and whisk together. 

In your stand mixer with the paddle attachment, beat together the sugar, butter, and shortening on medium until light and fluffy (about 3 minutes). Add the egg, and vanilla. Beat on medium speed for about 2 minutes. Next, add half of the flour mixture, and half of the milk mixture. Mix until incorporated. Scrape down the sides, and repeat with the remaining flour and milk. 


Drop 2 tablespoons of batter onto the prepared baking sheets. 


Place one sheet on the top rack of your oven, and the other on the middle rack. Be sure to rotate the sheets halfway through baking so they cook evenly. Bake for 10 minutes, or until the cakes spring back when touched. Place them on a wire rack to cool! 


Coffee frosting - 
• 2 sticks (1 cup) unsalted butter
• 1 tablespoon instant coffee
• 1 tablespoon hot water
• 1 2/3 cups powdered sugar
• pinch of salt

Mix the instant coffee with the hot water and stir until dissolved. In your stand mixer with the paddle attachment, beat the butter until fluffy, about 4 minutes. Mix in half of the sugar, and once that is incorporated, mix in the remaining sugar. Next, beat in the salt, and last, but definitely not least, the coffee. Time to assemble! 


Some of the cakes will be slightly different in size, so just try to pair em up as best as you can. Fill the whoopie pies with 2 tablespoons of frosting. I got 36 cakes, and 18 completed whoopie pies out of the recipe. 


Next up, Caramel Macchiato! 

For the coffee cakes - 
• 1 cup sugar
• 4 tablespoons (1/2 stick) butter at room temp
• 7 tablespoons shortening*
• 2 teaspoons baking powder
• 1 teaspoon salt
• 4 tablespoons instant coffee
• 2 tablespoons hot water
• 2 eggs
• 3 cups flour
• 2/3 cups milk

*you could use all butter, I just didn't have enough on hand.

Preheat your oven to 375° and cover two baking sheets with parchment paper. Mix together the instant coffee and hot water and stir until dissolved. Mix the coffee into the milk and set aside. Combine the flour, baking powder, and salt in a medium size bowl and whisk together. 

In your stand mixer with the paddle attachment, beat together the sugar, and butter on medium speed until light and fluffy (about 3 minutes). Add the eggs, and beat for 2 more minutes. Next, add in half of the flour mixture, and half of the milk mixture. Scrape down the sides and repeat with the remaining flour and milk. 


Drop 2 tablespoons of batter onto prepared baking sheets. Bake for 12 minutes, or until the cakes spring back when touched. Transfer to a wire rack to cool.


I had a can of Dulce de Leche sitting in my cabinet, so that's what I filled these babies with! Super simple and quick! I had a 13.4 oz can, and it was the perfect size. You can find it in any grocery store :)


Spread one tablespoon of Dulce De Leche on one cake, and sandwich another cake on top! This recipe made 40 cakes, and 20 completed sandwiches. Hopefully you make these, and enjoy!




Tuesday, September 17, 2013

Maple Cinnamon Glazed Pumpkin Scones!


Hi everyone! I can't believe fall is already here. I feel like just yesterday I was waking up at 6am for summer training (so upset that's over by the way). Fall is my absolute favorite season for a ton of reasons. One of the top ones would have to be the fact that fall means its time for pumpkin everything. Pumpkin Americanos have kinda been my jam recently, so much so that the baristas at Starbucks are starting to recognize me…Yikes? I choose to embrace it. I recently became a gold member which I'm pretty excited about. I also can't believe the international season has already begun! Colin and I just got home from the U.S. International Classic in Salt Lake City. We were happy with our skates and we are so excited for the rest of the season! Any who, enough about skating, let's talk scones. Personally, I love scones, any flavor, any time, scones and I are cool. Buut since it is fall, and I haven't made anything pumpkin yet, I thought pumpkin scones had to be my next post. 


Pumpkin Scones - recipe from Taste Of Home

• 4 1/2 cups all purpose flour
• 1/2 cup brown sugar
• 4 teaspoons baking Powder
• 2 teaspoons cinnamon
• 1/2 teaspoon nutmeg
• 1/2 teaspoon baking soda
• 1/2 teaspoon salt
• 1 cup of cold butter (2 sticks) cut into small cubes
• 2 eggs
• 3/4 cup milk
• 1 1/4 cups pumpkin puree

Preheat oven to 400°

Mix together the flour, brown sugar, baking powder, cinnamon, nutmeg, baking soda, and salt. 


Once incorporated mix in the butter (you may have to use your hands). The mixture will look like coarse crumbs. 


In a separate bowl mix together the eggs, 1/2 cup of the milk, and the pumpkin. Stir into the dry ingredients until it just comes together. Turn the mixture out onto a floured surface and knead 5-6 times. Cut the dough in half and form each half into an 8 inch circle. Cut each circle into eight wedges. Place the wedges an inch apart on a parchment lined cookie sheet and brush the wedges with the remaining 1/4 cup of milk.


 Bake for 12-15 minutes or until golden brown. Transfer to a cooling rack and cool for at least 10 minutes before glazing.


Maple Cinnamon glaze

• 1 cup powdered sugar
• 2 tablespoons maple syrup
• 2 tablespoons milk
• 1/2 teaspoon cinnamon

Mix together all ingredients until smooth. Use a spoon to drizzle the glaze over the scones and enjoy!


Let me know if there's anything you'd like to see in my next blog! Pumpkin or no pumpkin all ideas are welcome :)


Thursday, August 22, 2013

Coco-Loco Oatmeal Cookies!


I’m sure by now you’ve noticed that I’m a little bit obsessed with Chobani. I’ve been to grocery stores in Delaware, New Jersey, and Maryland in pursuit for as many flavors as I could get my hands on, mainly coconut. Thankfully, the grocery store down the street just started carrying it. Not that distance would’ve kept us apart. Is it possible to have a relationship with yogurt? If so, I think I’m cheating on my boyfriend. Sorry, but I have no regrets. Taking my little obsession into consideration I thought it would only make sense to involve coconut Chobani in my next recipe. This recipe uses not only Chobani, but coconut oil and shredded coconut as well. So, if you’re a fan of coconut these are definitely the cookies for you! 


Yep, I'm in love. 


• 1/4 cup coconut Chobani
• 1/2 cup coconut oil
• 1 1/2 cups brown sugar
• 2 eggs
• 1 1/2 teaspoons vanilla extract
• 1 1/4 cups flour
• 1/2 teaspoon baking soda
• 1 teaspoon salt
• 3 cups old fashioned oats
• 1 cup shredded coconut
• 1 cup semi-sweet chocolate chips

Preheat oven to 325° and line a baking sheet with parchment paper. In a small bowl whisk together the flour, baking soda, and salt. Set aside.


With your stand mixer or hand mixer beat together the sugar, Chobani, and coconut oil. 1/4 cup of yogurt is about half of a 6oz container. I'm sure just like me you'll be absolutely devastated that you have to finish off the rest of it ;) beat together until smooth. 


Beat in one egg at a time and then add in the vanilla. Once all of that is incorporated mix in the flour. Be sure to scrape down the sides of the bowl. Next, mix in the oats, coconut, and chocolate chips.


Drop by heaping spoonfuls onto your parchment lined baking sheets, keeping them about an inch apart. Bake for 14 minutes, or until golden brown. Be sure to rotate the baking sheets halfway through the cook time. Cool on the baking sheet for 5 minutes before transferring them to a wire rack to cool completely. Enjoy!


Sorry to write and run, but there's some Chobani in the fridge with my name on it. See ya next time :)


Monday, July 15, 2013

Carrot Cupcakes!


Hi everyone! Hope you've been enjoying your summer! Training is in full swing for us and I can't wait for all of you to see our new programs! Colin and I are so excited for the upcoming season :). I know it's been months since my last post, and I know I always promise to post more often, but this time I swear I'm really going to try! This recipe is a little odd considering there's baby food in it, but I promise its delicious, and definitely worth the awkward walk down the baby aisle at the grocery store. Carrot cake is something I've always loved and I wanted to make one that didn't have the usual nuts and raisins. So, I went with pineapple and coconut instead. I recently made these cupcakes for one of my friends and he was a fan so I hope all of you are too :)


Carrot Cupcakes
adapted from Sticky Gooey Creamy Chewy

• 2 1/4 cups flour
• 1 1/2 teaspoons baking powder
• 1 teaspoon baking soda
• 1 1/2 teaspoon ground cinnamon
• 1/2 teaspoon salt
• 1/4 teaspoon ground nutmeg
• 4 extra large eggs, at room temperature
• 1 1/2 cups granulated sugar

• 2/3 cups firmly packed brown sugar
• 1 cup canola oil
• 1/2 cup buttermilk
• 2 teaspoons pure vanilla extract

• 2 4oz jar strained carrot baby food
• 1 cup crushed pineapple - drained
• 2 cup finely grated carrots (approx 3 carrots)
• 1 1/2 cup shredded coconut


Yield - 2 1/2 dozen


Preheat oven to 350°
Line a muffin tin with cupcake liners and set aside.
Whisk the flour, baking powder, baking soda, cinnamon, salt and nutmeg together in a bowl. 


In a separate bowl beat the eggs, sugars, oil, buttermilk, vanilla, and baby food together. Add the dry ingredients to the wet ingredients and mix until fully incorporated. Stir in the carrots, pineapple, and coconut just until evenly distributed throughout the batter.


Pour the batter into the prepared pan filling cupcake liners 2/3 of the way up. Bake for 20-22 minutes, or until a toothpick comes out clean. Cool cupcakes in the pan for a few minutes before transferring onto a cooling rack. 


Want to bake a cake instead? Coat and line two 9-inch cake pans with parchment and bake for 35-40 minutes :)


Cream Cheese Frosting
• 16oz cream cheese at room temperature
• 1/2 cup (1 stick) salted butter at room temperature
• 4 1/2 cups powdered sugar
• 1 teaspoon vanilla extract

Combine the cream cheese and sugar. One cup at a time slowly incorporate the powdered sugar, be sure to scrape down the sides in between each addition. Once all the powdered sugar is incorporated mix in the vanilla extract. Frost your cupcakes and enjoy!


I'm going to be posting cookies next, and I already have an idea, but if you want to see something in particular please let me know!


Sunday, February 17, 2013

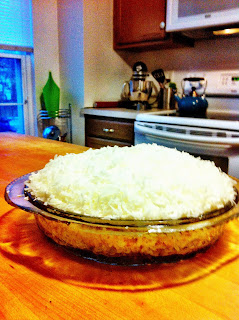
Chocolate Coconut Cream Pie


Hi all! I'm sorry it's been so long since my last post! With Nationals, and giving myself some mean 2nd degree burns, I've been a little busy. But now that the season is over, and I have some more down time I promise I will be posting more frequently! I can't believe our season is over, time has flown by! A huge thanks to all the fans! Your support means the world to Colin and I, and we are so excited for next season!
 Now, back to the baking. I love the combination of chocolate and coconut, so I definitely wanted to do something with those flavors. There isn't a lot of chocolate, just a little layer of ganache under the pie filling, but I think it does the trick ;). 


Coconut Crust - recipe from Jan Can Cook

• 3 cups sweetened coconut flakes
• 1 stick butter (1/2 cup)

Butter or spray your favorite pie plate. In a large skillet over medium heat combine butter and coconut. Cook until the butter is completely melted and the coconut flakes are golden brown. 


By the way, I've decided its impossible to be neat when there is coconut involved. Towards the end, I just stopped trying. Place the coconut in the prepared pie plate, and firmly pack with the back of a metal spoon. I started out using my hands, but quickly switched when I decided I wanted to keep my finger prints. You would think since I burned myself I'd be more cautious…but apparently that's not the case. I really am trying to be more careful though, one burn was enough for me! Place in the fridge until firm, about 30 minutes. 


Chocolate Ganache

  • 4oz semisweet chocolate
  • 1/2 cup heavy cream
  • 1/2 tablespoon butter

Place chocolate in a small bowl. Heat heavy cream in a small sauce pan over medium heat until it just simmers. Pour the cream over the chocolate and let sit for about 5 minutes. Add in the butter and stir to combine. Once the crust has hardened, spread the ganache over the bottom of the crust. Stick in the fridge until firm, about 15 minutes. 


Cream Filling - recipe from Jan Can Cook
  • 4 egg yolks
  • 3/4 cup sugar
  • 3 tablespoons cornstarch
  • 1/4 teaspoon salt
  • 1/4 cup flour
  • 3 cups half and half
  • 2 teaspoons vanilla extract

In a small bowl whisk together the egg yolks, 1/4 cup of sugar, cornstarch, flour, and salt. Slowly mix in 1 cup of half and half. 

In a saucepan over medium heat, combine the remaining 2 cups of half and half and 1/2 cup of sugar. Bring just to a boil. Add the egg mixture and cook and whisk until the mixture returns to a boil and thickens. 


Remove from heat and stir in the vanilla extract. Transfer to a bowl and cover the surface with plastic wrap to prevent a skin from forming. Let cool. 

Once the filling has cooled pour into the crust and spread evenly.


Whipped Cream 

  • 1 cup heavy cream
  • 1 1/2 tablespoons powdered sugar
  • 1/4 teaspoon vanilla extract


Whip heavy cream until it starts to thicken. Add in the powdered sugar and vanilla and continue to beat until light and airy. Spread on top of the pie and enjoy! You can top it with coconut or just leave it as is :). 


If theres anything in particular you'd like to see me post next feel free to send suggestions to me on twitter @stasiarose! 


Monday, December 3, 2012

Mommom Rose's Pizzelles!


Happy December everyone! Time has been flying by, and I realized I hadn't posted a blog in a little while. This is my absolute favorite time of year. Between the decorating, buying gifts, and christmas music, how could it not be? As you can see from our chalkboard wall, we're all a little excited about Christmas. Bella, Colin, Michael, and I decided it was time to decorate the townhouse. So, I figured while they were decorating the tree I would bake my first holiday treat of the season. Not that I don't enjoy decorating the tree, but Bella just tends to move all the ornaments I put up. Apparently I have spacing issues. So, I figured I would bake instead! For my first holiday treat I went with…Pizzelles! I used not only my Mommom Rose's recipe, but her pizzelle iron as well.


The "Pizzelle Chef" has gotten a lot of use over the years, and it is still kicking. By the way, do you think we have enough coffee makers? No? Good, because we also have a french press that isn't in that picture. The roomies started on the tree, so I started on the Pizzelles.


My Mommom Rose's Pizzelle Recipe - yields about 3 dozen
• 3 eggs
• 3/4 cups sugar
• 1 3/4 cups flour
• 1/2 cup crisco (melted and cooled)
• 2 teaspoons baking powder
• 1 tablespoon anise extract (you could also use vanilla)


First, pre heat your pizzelle iron. Combine baking powder, and flour, and use a whisk to combine. You could sift the flour and baking powder, but personally, I hate sifting and I think whisking works just as nicely. In a separate bowl, beat eggs, and add sugar gradually. Beat until smooth. Add the crisco, and the anise extract. Add the flour mixture to the egg mixture and combine. The dough will be sticky, and similar to a cookie dough consistency.


Easy enough, right? Now it's time to get cookin'! Spray the pizzelle iron with nonstick spray, and drop batter by the teaspoonful onto the iron. I like to place the dough slightly behind the center of the pizzelle pattern. When you close the iron it tends to push the batter forward slightly. 


It took my Pizzelles 30-45 seconds to get golden brown, and delicious. How long it takes will depend on your exact iron, they're all a little different. For example, my Mommom Rose's? The Pizzelle on the right always end up stuck to the top.

It might take you a few burnt or misshapen ones to figure out exactly how long to cook them, how much batter to use, or where the batter should be placed, but don't worry, you'll get the hang of it :). Once they're finished, remove from the iron (I used a butter knife to lift them off) and place on a cooling rack.


It only takes a few minutes for them to cool completely! You can dust them with powdered sugar, dip them in melted chocolate, or just leave them as is. Oh, and if you were wondering, the tree decorating was going nicely.


I wouldn't be surprised if that ornament was moved shortly after this was taken. I'm serious, ornament spacing is very important in this house.


I did end up getting to hang one ornament, mostly because it's mine. There's also a chance Bella told me where to put it. He's pretty cute, right? I hope everyone has a Happy Holiday!


Thursday, October 11, 2012

Pumpkin Whoopie Pies!


Hello again! So, at the end of my last blog I insinuated that I would make something with an unexpected ingredient. Since October has arrived, I couldn’t help but choose to make something different. So, here is my fall twist on a tasty treat…Pumpkin whoopie pies! Whoopie pies are one of my absolute favorite things to bake, and this time of year pumpkin seems to call my name. There was no roommates quarrel this time around. I mean, who doesn’t love a pumpkin whoopee pie? Well, actually Bella. She isn’t too fond of pumpkin (I know, she clearly has no taste). She does however (along with Colin) believe that I make some of the best cream cheese frosting around. Not to toot my own horn or anything, but toot toot :). So, without further ado, lets make some whoopie…pies! 


Pumpkin Whoopie Pies - recipe from Food.com

  • 1/2 cup sugar
  • 1/2 cup brown sugar (firmly packed)
  • 1 cup (2 sticks) unsalted butter at room temperature
  • 1 cup canned pumpkin
  • 1 teaspoon vanilla extract 
  • 1 egg
  • 2 cups flour
  • 1 teaspoon baking powder
  • 1 teaspoon baking soda
  • 1 teaspoon cinnamon
  • 1/4 teaspoon nutmeg
  • 1/4 teaspoon salt

Preheat oven to 350°. Grease or line baking sheets with parchment paper. In a large bowl beat butter and sugars until light and fluffy. Mix in pumpkin, vanilla, and egg. Slowly mix in the flour, baking powder, baking soda, cinnamon, nutmeg, and salt. Drop by rounded teaspoon or tablespoonful 2 inches apart on your prepared baking sheets.


 I used a tablespoon sized cookie scoop, but feel free to make yours smaller. Mini whoopie pies are always adorable :). Bake 10-12 minutes for teaspoonfuls, or 11-13 minutes for tablespoonfuls. They will still be soft when they come out of the oven, but if they are no longer wet to touch they are good to go! They will continue to set up as they cool. 


Cream Cheese Frosting

  • 8oz cream cheese at room temperature
  • 1 cup (2 sticks) salted butter at room temperature
  • 4 1/2 cups powdered sugar
  • 1 teaspoon vanilla extract

I realize there's unsalted butter for the pies and salted butter for the frosting. If you don't want to buy both (which I would understand), then just use salted butter in the whoopee pie recipe and don't add the salt.

Combine the cream cheese and butter. One cup at a time slowly incorporate the powdered sugar, be sure to scrape down the sides in between each addition. Once all the powdered sugar is incorporated mix in the vanilla extract. 


Now it’s time to assemble the whoopie pies! You can fill them any way you like, but I had a little stroke of genius whilst I was assembling. I used the same cookie scoop that I used for the whoopee pie batter! I scooped up the cream cheese frosting, placed it on one whoopie pie, and then sandwiched the other half on top! It worked out perfectly. 


You should have about 16 completed whoopie pies. You will have leftover cream cheese frosting, so you can halve the frosting recipe if you like. I think it’s nice to have extra frosting lying around. You can add it to store brought brownies for a nice homemade touch, pumpkin bread, or pretty much anything you like. Me? I usually give my leftover frosting to my friend Taylor Toth :). 


I hope you enjoy these just as much as I do! I'm not going to make any promises for my next post, who knows what I'll be thinking ;).